Showing posts with label Unit 30 - Camera and Lighting. Show all posts

Thursday, 3 December 2015

New Wave - Film Evaluation

Evaluation and Health & Safety

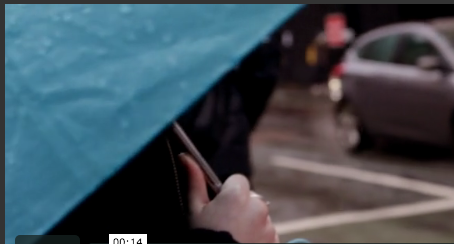
My new wave sequence was constructed of an array of shots that I had captured in various locations, structured in the form of a montage. By doing this, I have given the viewer the ability to derive meaning from the film based on their own interpretation. I felt that this was a key theme surrounding a majority of the New Wave texts that I had looked at for my contextual study. In terms of concept, this style provides a loose narrative which makes the film easy to follow, but not too conventionally organised.  

When conducting on location shoots, I was sure to consider the practical elements of health and safety. I ensured that all of my equipment was correctly put away when not in use and whilst shooting, I had to be sure that both myself and my apparatus were not obstructions which could lead to potential physical harm for pedestrians or those around me.

When assembling the footage together, I wanted to make sure that the rough trademark of new wave editing was made apparent, therefore I was not too careful in selecting where to cut the shots. With long takes, I transformed them into a series of jump cuts, adding a sense of discontinuity.


Similarly, I was sure to keep a consistent flow throughout the sequence, by maintaining the choppy editing style. I also incorporated elements that were featured in the New Wave, such as having the subject look directly at the camera, ultimately breaking the fourth wall and acting as a reminder to the audience that they are simply watching a film. This was commonly demonstrated in French new wave films, shedding new light onto the world of cinema and transforming film making from the conventions of classic, large scale productions.


I also experimented with the use of colour, taking inspiration from Daisies (1966) and the creative use of filters used within the iconic nightclub scene. Shifting between exotic hues adds a sense of the unconventional as well as enhancing the surreal essence of the film. In addition to this, colour has the potential to influence the audiences feelings towards what they view on screen, as each shade holds personal connotations, hence every viewer may develop varying interpretations.

'Daisies' (1966)
However, I did not want to make the effect so drastic within my own film, so I altered the colour levels slightly, just enough to add a slight tint to each shot. I did so with purpose, although the effect was predominantly done for aesthetic purposes, I ensured that the colour complimented the tone of the shot, in order to enhance the focus of it. For example, for a location shot of a secluded area of Digbeth, I added a cold filter, to represent the solitude felt when present there.


 Overall, I found that I was able to manage my time effectively; by documenting my planning for each shoot, I was able to express the developments in my ideas and then elicit them in a practical sense. Such as altering the fundamental concept so that it was not too heavily based around a narrative, as this would not have been true to the nature of new wave. Most new wave productions emitted a sense of spontaneity in terms of their content and I wanted to be as authentic as possible when making my film, hence created a montage of scenes which were loosely connected, so that the viewer is able to derive their own interpretation of events.

 As a result, I was able to produce a new wave montage sequence that combined various elements displayed by the movement. I felt that this project particularly allowed me to explore and strengthen my editing skills, as there was a vast amount of footage to sift through and implement into a sequence. In addition, the fact that I edited to audio and a poem also stretched my ability to edit in time.  

Wednesday, 2 December 2015

New Wave Film


New Wave - Video Planning

Shooting Plan 3

In terms of editing, I have decided to cut my footage in time to the poem 'Ode' by Arthur O'Shaughnessy, as a majority of what I have already shot corresponds lyrically and conceptually with the poem. By doing this, the creatively surreal element will be significantly enhanced, creating a vivid depiction of events, from which the viewer is be able to draw their very own interpretation.

When conducting the research for my contextual study, I analysed a selection of films from the Czech new wave movement. From doing this, I found that although each text had a different director and concept, the underlying similarity stood out in a visual sense; surrealism was the common undertone.


With this in mind, I plan to conduct my third shoot in Birmingham and Digbeth. Within this shoot, I will not be focusing so much on the subject, instead I will be filming the location itself and any objects that I find are relevant to the context of the poem. Combining this footage with what I have already shot of the subject will provide a good array of scenes to create the surreal ambience that I wish to achieve.


In regards to health and safety elements, I must ensure that my equipment is correctly packed away when not in use and that I am mindful of pedestrians, as I do not want me or my apparatus becoming objects of obstruction which could lead to potential harm. 

New Wave - Video Planning

Shooting Plan 2

By altering my concept slightly, so that the film is not too heavily structured upon the foundation of a narrative, I have decided to compose my film in the style of a montage. Therefore, for this shoot I planned to collect shots of the subject that I could use in a surreal style montage. I intended to capture in the style of new wave, hence making use of natural light/sound, filming long takes that could be edited as a series of jump cuts and all shot using a handheld camera, as seen in Godard's "Breathless'.


This shoot took place within Manchester as I had planned to capture a selection of settings to feature the subject in. As the film I am creating is a montage and an expression of creativity, I visited galleries, having the subject look at the art itself, suggesting that as they begin exploring a pleasantly aesthetic world, they are inducing their own creative energy.


In addition to this, I captured the subject around the city of Manchester itself, this not only allowed me to capture the setting, it also provided me with the opportunity to utilise natural lighting and make explicit use of handheld camera. Which worked, in both an aesthetic term and a conceptual one.


New Wave - Film Brief 2


By conducting shoots, I found that the initial concept for my new wave sequence was based too heavily around a structured narrative. Hence, I have decided to adapt my work so that it is more visually surreal, yet explicitly illustrates all the recognisable features of the new wave.

In order to achieve this, I intend to collate my footage into a form of montage, something that was done prominently within a variety of new wave films. Using jump cuts and other discontinuity techniques, which will provide the distinctive and somewhat imaginative flavour of such alternative film making. In doing so, I do not want the film to become confusing and difficult to follow, therefore, I intend to have the same subject, so that there is some consistency and an almost narrative. So combining shots of the subject and various other location shots, I will produce a creative montage that explores the elements of the new wave as a whole.

Overall, I want to convey an expression of creativity, as it appears to be the foundation upon which a majority of new wave movements were constructed. Like the texts I had studied for my contextual essay, from the Czech movement, the viewer is able to develop their very own interpretation, as a result of the loosely structured narrative and abstract depiction.

New Wave - Video Planning

Shooting Plan 1

For my initial shoot, I intend to experiment with lighting techniques. For this, I will particularly make use of natural lighting, as it was something that a majority of new wave films utilised; the natural element completely juxtaposed the conventional large studio set-up, which had become the norm for film productions made prior to such alternative cinematic movements.

As the initial idea for my film focuses upon expressing beauty ideals within todays society, I would like to shoot the subject in quite an alternative manner; I intend to focus upon the shadow of the subject, as this is suggestive of distorted perceptions that one may hold about themselves.


I experimented with surfaces that are the right texture/colour to capture shadows without reflecting too much light, in order to capture the effect with clarity. The outcome created a surreal ambience, which was what I desired to create, this kind of footage would be ideal to feature within a montage sequence, something that was common amongst a variety of new wave films.

The indirect filming also holds significant conceptual depth, connoting towards the inability to view oneself with acceptance. This will also give me the opportunity to develop some narrative, centred around the subject and a discovery of who they are.

Thursday, 5 November 2015

New Wave - Brief

New Wave - Film Brief 

When analysing various new wave movements along with the films themselves, I found that they all shared a common theme. It appears as though their predominant aim was to highlight a specific social aspect and bring some awareness to the possibility of a counterculture. For my contextual analysis, I looked at Czechoslovakian New Wave and the found that the films produced within the movement portrayed a strong message about living under the confines of a Communist Government. Correspondingly, new waves of other cultures were also delivering similar messages in relation to their social conditions at the time.

Cinematically, many of the films opposed typical conventions, both in terms of the types of shots used and the editing style. Some conspicuously lacked any sense of continuity, disregarding techniques like eye-line match and making use of jump cuts, creating a disjointed and unconventional feel. This free editing style perfectly complimented the loosely structured narrative that many of these texts utilised.

With all of the above in mind, I intend to consider what areas of today's society I could possibly highlight and use to depict some form of counterculture. However, I also want to ensure that I do not produce a tightly structured narrative, instead I want to direct attention to the way the sequence is shot. Conceptually, I have the idea of looking at beauty ideals within today's society; in terms of shooting this, I intend to use the camera as a mirror, having the subject conduct some sort of beauty routine, make up or hair etc. In technical terms, to make this particularly appealing, the use of a shallow depth of field would be ideal in order to really isolate the subject. Similarly, the use of extreme close ups focusing upon the eye or the mouth area will be effective in delivering the conceptual element, as well as adding a great deal of visual diversity.

In terms of editing, this will provide the perfect opportunity to make use of jump cuts, in order to develop a sort of disorientated feel. I would intersect these shots with others, that are much more symbolic and indirect. In new wave I have found that although certain techniques look like they have been used purely for visual or aesthetic purposes, they in fact represent something much deeper, each shot - as unorthodox as it may appear - holds some sort of symbolic significance.

The visual style of new wave is very distinctive, with rough editing, use of natural lighting/settings and clear use of handheld cameras. The overall feel that these films conceive results in a raw appeal, which offers something fresh and youthful to the world of cinema. Hence a majority of the films were accepted amongst an audience that consisted mainly of young adults. The directors themselves were relatively young too and this was made apparent by the content of many of the films, as they were quite radical in nature. Therefore, I would like to aim my sequence towards a younger audience, hence I will allude towards certain topics that are relevant amongst the youthful generation of our society.

Visually, I plan to shoot and edit in accordance with past new wave movements so that I can authentically portray the effect of these rather alternative films. I will shoot without the use of a tripod and incorporate such edits as jump cuts, in order to show a contrast between the typical conventions of cinema and new wave.


In addition, I intend to keep a very loose structure in terms of narrative; in order to do this I would like to maintain a surreal and almost hypnagogic style, which I have recognised as a key feature particularly in Czech new wave. Yet at the same time, I intend to touch upon specific themes in society. My ultimate aim, is to create a short film that holds visual depth through the use of symbolic imagery and by doing this, the audience will be able to derive their own interpretation of the film by what they can identify most with. 

Wednesday, 21 October 2015

Shutter Speed

The Shutter Speed function, is what determines the length of time in which the camera's sensor is exposed to the available light source. Hence, the longer the shutter is open, the greater amount of time the sensor has to gather light. In low-light settings a longer shutter speed is typically required to ensure correct exposure, by allowing more light to reach the camera sensor.

Often, shutter speed and frame rate are referred to in the same context, however, the frame rate indicates how many frames are captured per second, whereas the shutter speed simply refers to the amount of time in which a single frame is exposed for.

One of the major influences on the sharpness of an image, is based on camera shake and the subject's movement (Slyvan 2012). This means that a lower shutter speed is allowing more light from the subject into the camera, therefore their movement may appear less sharp, or may even produce blur. A greater shutter speed will produce less blur and capture more sharply.

In my own examples, I used two different shutter speed settings. the first video was shot using a shutter speed of 50, whilst the other one was set at 125.


Overall there is a visual difference between the two shots, particularly in terms of clarity. The first shot does not depict each feature of the water and its movement so explicitly, whereas the following clip shows greater detail and sharpness.

As I was adjusting the shutter speed, I had to ensure that each video was exposed correctly, therefore altered the ISO and aperture settings accordingly.

Reference List:
SLYVAN, R. (2012) Nikon D3200: From Snapshots To Great Shots. San Francisco: Peachpit Press.

Tuesday, 20 October 2015

Art Foundation Shoot - Reflection and Health and Safety

In order to authentically portray the range of artwork, I ensured that I'd captured a range of shots, involving various camera techniques and styles, in order to show the individuality and striking diversity that each piece offers. This way, I would be able to present the visual aspect of the work, as well as conveying a sense of the conceptual essence.

I used a zoom lens, to get a larger aperture and compensate for the low light available indoors. this also provided me with an opportunity to explore with focus techniques and the use of a shallow depth of field, to really focus upon a single focal point. I also combined a range of pans, tilts, close ups and wide shots, in order to get a feel of the overall art space and the separate creations.


When filming in the Art Studio, there were many things that I had to consider in regards to health and safety.

Potential risk hazards include the floor conditions, any spillages or materials that may pose a risk of slipping or damaging equipment must be dealt with correctly. Hence, I ensured that nothing was in the way of myself and the camera set-up before conducting my shoot.

Similarly, when using the tripod I had to check that it was positioned in such a way that it would not become an obstruction to anybody within their personal or work space. In addition, I ensured that the tripod I was using was not going to fall and potentially cause any breakages.

Art Foundation Shoot


Monday, 12 October 2015

Lighting - Studio Set-up


To achieve Edge Lighting, also referred to as Split Lighting, I used a single light source, positioned at a 90 degree angle from the subject. This resulted in low-key lighting, casting half of the subject into shadow and half into light. Producing dynamic and a high contrast. I also made use of panning, to offer a wider perspective of the overall shot.

In order to authentically create the effect of Rembrandt Lighting, it took a few attempts to get the positioning of the key light accurate enough to create the iconic triangle of light under the eye of the subject.I adjusted the height and angle accordingly, around 45 degrees from the subject. I was able to achieve the desired look, however I felt that the intensity of the lighting technique could have been improved in order to make the specific attributes much more conspicuous. To fix this, would simply require more practice and experimentation.


Whilst shooting in the studio, there were many things that I had to consider in terms of health and safety. First of all, I ensured that the tripod was set up correctly and not posing any harm by obstructing anything, or anyone, avoiding any potential for breakages.

Furthermore, when I was not not using the studio lights, I was sure to switch them of, allowing them to cool in order to prevent them from overheating and posing a potential risk hazard of injury by burning.

Lighting - Diffuser & Creating Shadows

Using diffusers allows the available light to be dispersed in an experimental manner, in this case, casting a visual array of light and shadow across the face of the subject. Also producing interesting shapes and structures that create a deep and intriguing contrast.


Lighting - High Key & Low Key

Light not only provides us with the ability to see an object or subject, it also adds to mood and ambience, offering various atmospheric elements. Both natural and artificial lighting is heavily responsible for giving visual depth and meaning in moving image, therefore I experimented with capturing a variety of scenes in different lighting situations, in an attempt to develop a better understanding of how to use light in the most effective way.

I looked at the use of a low light set-up and began by exploring the effect of natural light; although it may be predominantly associated with high-key lighting, I wanted to manipulate it in a way that would produce a nice contrast between high and low-lights.


For these videos, I made use of window frames and blinds, allowing them to cast shadows across the subjects, creating various shapes and manipulating the intensity of light, hence acting as a diffuser.
To add visual appeal, I also incorporated the use of rack focus, shifting the perspective and making use of the entire frame. Overall, quite a moody atmosphere was created, offering an alternative interpretation to these otherwise mundane objects.


In addition to this, I used a studio set-up to achieve low-light. By using a backlight as the predominant source of illumination, a somber and more dramatic ambience was conceived. The light was placed to the side of the subject, opposite the camera position. This created a distinct contrast, placing only half of the subject in illumination.


I then began to experiment with using natural light to create more high-key style lighting. Although it is a powerful light source, the way it is used will determine what kind of light is produced. Therefore, I chose to have the subject, or the object directly in the light, allowing them to be illumined to a higher extent. The colour that the light produces, is also a significant factor in affecting the overall ambience and in this instance, a warm tone has been constructed, as a result of the use of natural sunlight.

Wednesday, 7 October 2015

Aperture

The Aperture setting on a camera, is responsible for adjusting how wide the opening of the lens is, therefore will dictate how much light will enter the camera. A shallow depth of field means that the lens will be open wider, whereas a deep depth of field, will result in a narrower opening.

Aperture value is represented in terms of f/number; a lower value indicates a shallow depth of field and vice versa. For example, f/2.8 will result in a fraction of the frame being in focus, as opposed to f/22, which will ensure that a majority of the shot is in focus. Depending on the lens used, varying aperture settings will be available. Macro and telephoto lenses will allow a larger aperture, as opposed to standard lenses, some allowing an f/stop value of f/1.4 or f/2.8.


Using a shallow depth of field, means that there can be one significant area of focus, creating a more atmospheric and intimate feel to the shot. For my own example, using an aperture setting of f/2.8 with a telephoto lens, I chose to focus on something insignificant in size, in order to create the desired blurred background, to really exaggerate the shallow depth of field. The colourful background produced an enticing mosaic of hues, however did not distract from the predominant subject, within the foreground. In order to perfect this video further, I would chose to shoot it with the use of a tripod, in order to reduce camera shake and ensure maximum clarity.


I also experimented with using a slightly smaller aperture, just to identify and highlight the minor distinctions. Using f/5.6 with the use of a standard lens, again produced a shallow depth of field, with a selective proportion of the frame in focus however in comparison to the previous example, the large aperture was not so visually drastic.


A wide angle lens is typically used to capture vast shots that have multiple, significant details in them, such as landscapes. Therefore, a small aperture setting would be relevant in order to keep a majority, if not all, of the frame in focus. An f/stop value ranging from f/11 to f/22 would suffice.
For my visual example, I experimented with f/22 I incorporated the compositional quality of rule of thirds, in order to make full use of the foreground, mid-ground and background, presenting me with more visual elements to keep in focus.


Overall, the most difficult aspect of this task, was ensuring that all my videos had been captured with the correct exposure. By varying the aperture settings, I had to adjust the shutter speed and ISO accordingly; for the shots with the deeper depth of field, I increased the ISO without allowing the shot to become noticeably grainy and reduced the shutter speed to compensate for the overall reduction in exposure. Similarly, for the large aperture examples, it was difficult to keep the shots from becoming overexposed, as a result of such a shallow depth of field, therefore I had to correct the levels in post production.


Friday, 2 October 2015

Focus Techniques


Where the camera is focused, determines where the attention of the audience will be directed. There are numerous focusing techniques all recognisably used within moving image production.

Deep Focus refers to a shot that keeps all areas of the frame in sharp focus, including the foreground, mid-ground and background. This means that each detail which is featured within the shot must be planned and positioned with care, as it will be visible in the frame. This technique was beloved and commonly used by Orson Welles and cinematographer Gregg Toland.

Still taken from 'Citizen Kane' 
In order to achieve this technique, the use of a higher f/stop would be required, to ensure that everything in the shot is clearly in focus. This also adds compositional value, as the rule of thirds has been considered. Within the film 'Citizen Kane', Welles also makes use of a wide angle lens, to add an element of psychological tension; the effect results in the predominant character Kane appearing superior in size, as opposed to others in the shot; this acts as a metaphorical expression for his powerful and overbearing personality.

Conversely, the use of a Shallow Focus, will produce a video in which only a certain section of the frame is in focus. This will depend upon the aperture setting and focal length of the lens. In addition, the distance that the camera is, from the subject is also a determining factor in what effect the focus technique will create. This type of focusing is good for directing the viewers attention to a particular area of the shot, naturally, the eye will follow whatever is in focus.


Rack Focus, also referred to as Pull Focus, alludes to a technique which entails shifting the focus from one area in a shot to another point. For example, from the foreground to the background or vice versa. As opposed to deep focus, the use of a shallower depth of field would be more relevant in trying to achieve this technique, as there will be more of a noticeable shift in focus.

For my own example of rack focus, I decided to shoot something that was, in terms of visual presentation, fairly consistent in structure. So that I could alternate the focus between areas of the frame effectively, as well as implementing a sense of balance.


Reference List:
FREER, I. Film Studies 101 [Online] Available from: http://www.empireonline.com/features/film-studies-101-camera-shots-styles/p1[Accessed: 23rd September 2015].

Brown, B. (2012) Cinematography - Theory and Practice. 2nd Edition. Oxford: Focal Press.


Monday, 28 September 2015

Practical Skills

Sound In Moving Image production 

Sound is a fundamental element of moving image production, therefore it is paramount to consider how it is captured. The camera microphone will not always be the most sufficient way of capturing audio, as a result the use of external microphones may be required. The source of the sound will determine what type of mic is used, certain things to consider are: the sensitivity of the recording device,  its ability to withstand specific sound pressure levels, its directional response and the range of frequencies it is able to capture.

In-built Camera Microphone - 
Using the camera microphone, on auto mode, resulted in poor audio quality overall. Although what was captured was more than audible, maximum clarity was not achieved.


Stereo Microphone -
By using the Zoom H1, audio was captured in a stereo format. Picking up the sound source from varying directions, hence giving an overall dimensional sound quality.


Shotgun Microphone -
The directional pick up pattern of this microphone ensured that the audio was captured with clarity, with little interference, producing clearly audible sound. 


Wednesday, 23 September 2015

ISO Task


The type of lighting that is available on a shoot, will not only determine the overall exposure, it will influence the camera settings. The ISO dictates how sensitive the camera is to light, therefore the higher the ISO value, the more light will reach the sensor. It also means that there will be more grain/noise. I experimented with capturing a series of videos, using different ISO settings in an attempt to establish what visual differences manifest.

Initially, I wanted to capture the same video using two different ISO settings, therefore opted for a low value of ISO 100 and a relatively high value of ISO 1600.

Using ISO 100 resulted in a video that delivered detail with much more clarity, as opposed to ISO 1600. In the first video, the texture of the guitar strings, fretboard and even material that the subject is placed on has been captured. Whereas in the second video, not so much has been portrayed to that extent. Although the difference isn't so conspicuous, there are some variances, such as the overall brighter tone to the video shot with a higher ISO and the slight loss of detail on the texture of the surface that the guitar is lying upon. I specifically chose to incorporate rack focus into the shot, not only for visual purposes, but also to highlight the aspects of detail across the shot, when using different ISO settings.


Guitar - ISO 100


Guitar - ISO 1600

I found that shooting in low light situations can be challenging when trying to ensure that the correct exposure is achieved in each shot. I shot a set of candles using ISO 1600, which managed to illustrate the objects and produce relatively good exposure. Conversely, when shooting the same thing using ISO 100, I found that it was difficult to produce correct exposure and as a result I implemented the use of an external LED light source. When comparing the two shots, it is clear that the lower ISO setting produces much crisper detail, whereas the higher value creates some amount of grain and reduces the overall quality to some extent.

Candle - ISO 1600


Candle - ISO 100

I also shot outdoors to get a feel of how available lighting will affect exposure when manipulating the ISO setting. By focusing on a street lamp, I used ISO 1600, in order to capture the light source, as well as some of the detail of its surroundings. I used a tilt shot, in order to enhance the low light setting and how this affected the immediate surroundings of the subject. Again, I found that the overall quality was lost slightly and certain elements like, texture and dimension, were not delivered with such clarity.


Street Lamp - ISO 1600

On the whole, I found that when directly comparing each video, the most conspicuous difference was the amount of grain produced and how it degraded the overall quality of series of moving images. I felt that this task allowed me to explore and challenge my technical skills, particularly in regards to correcting exposure. I was able to experiment with varying sources of light and manipulate the situation in order to ensure I could capture what I intended to.

Friday, 18 September 2015

Camera Shots - Video


Camera Shots and Movements

Unit 30 - Camera Shots

Camera Shots and Movement - Evaluation

There are varying elements that compose the visual aspects of film's language, including camera shots and movements.

From experimenting with capturing a range of these, I found that there was a diverse element of trial and error. Overall, I wanted to achieve a consistent level of quality in terms of composition, therefore I chose to shoot within a location that offered visual appeal and aesthetic, whilst not distracting from the predominant point of focus, therefore I chose a setting that displayed a range of neutral hues. In addition, I worked to incorporate such composition like rule of thirds  and Leading Lines, as well as making full use of the foreground, mid-ground and background.

For the Establishing Shot, I wanted to express the significance of the surroundings, however still keep the focus upon the subject; as a result, I decided to have them within the centre of the frame. The location itself formed a sense of natural balance and symmetry, complimenting the use of leading lines, allowing the viewer to follow the movement of the subject. Overall, I felt that this was a successful capture, as it combined good composition, with the depth and dimension of the shot type.


Correspondingly, the range of portrait style shots, from Long Shot to the Extreme Close Up, worked particularly well, as a result of composition and the fact that I chose to shoot them using a relatively shallow depth of field, to allow the predominant focus to fall upon the subject. However, as a result of the chosen location, I was faced with the issue of camera shake, due to the wind. To overcome this problem in the future, I would be sure to have a more steady camera set-up; using a fluid head tripod would be an appropriate option, as they provide more stability and are specifically designed to cater for moving image production.


For the Tracking Shot the most challenging aspect, was trying to get as little camera shake as possible. However, without the use of suitable equipment - such as a dolly - this wasn't easily achieved. Conversely, the hand-held element did provided a more authentic ambience, by really accentuating the organic setting and placement of the subject within the frame.


For the final video, I chose to have title slides that explain each camera shot or movement, as opposed to a voiceover, as I felt that this would provide more detailed, yet succinct explanations. Following this, cinematic examples are presented, to allow the viewer to recognise the shot in a more familiar format, then once they are able to identify and recognise it, my own example is presented.


I kept this order consistent throughout video and - with the use of bins - kept each of the files within their own folder to keep things organised and clearly laid out.


Overall, I feel that this project allowed me to explore, challenge and strengthen my own camera and editing skills, both technically and compositionally, which I can now implement into future tasks. 

Wednesday, 16 September 2015

Unit 30 - Technical Skills

Aperture, Shutter Speed and ISO 


The technicality of a camera is vital to the overall production of moving image. There are three predominant settings that are paramount to consider.

ISO, which is ultimately the sensitivity of the camera towards a light source, determines how much grain or noise will affect the end product. Lowering the ISO value, will ultimately decrease the level of sensitivity, whereas increasing the ISO number will result in greater sensitivity. The element within the camera, which alters sensitivity, is the camera sensor. It is the part of the camera, that is responsible for gathering light and transforming it into an image (Photography Life 2009).

ISO 200 and ISO 3200 Comparison

A higher ISO value allows you to capture within a low-light environment, however the higher the sensitivity, the more grain is introduced to the shot (as displayed within the image above).

The Shutter Speed function, is what determines the length of time in which the camera's sensor is exposed to the available light source. Hence, the longer the shutter is open, the greater amount of time the sensor has to gather light. In low-light settings a longer shutter speed is typically required to ensure correct exposure, by allowing more light to reach the camera sensor.

One of the major influences on the sharpness of an image, is based on camera shake and the subject's movement (Slyvan 2012). This means that a lower shutter speed is allowing more light from the subject into the camera, therefore their movement may appear less sharp, or may even produce blur. A greater shutter speed will produce less blur and capture more sharply.

Figure 4.3

Figure 4.4

Aperture is responsible for dictating depth of field, therefore determines how much of your shot is in focus. This is particularly useful when trying to isolate the subject, or an object in the foreground, whilst reducing distractions from the background. Aperture is represented with f/stop values, which is effectively relates to the focal length of the camera lens divided by the diameter of the aperture; a higher f/stop number, will result in more of the shot being in focus, as less light enters the camera and a lower value will increase the aperture, by allowing more light to reach the camera sensor, therefore producing more blur.


Depth of field, along with composition, is a major factor in how you direct attention to what is important in your shot (REVELL 2011). As a result it also adds some degree of aesthetic value.

Reference List:

MANSUROV, N. (2009) Photography Life: Understanding ISO [Online] Available from: https://photographylife.com/what-is-iso-in-photography [Accessed: 16th September 2015]

SLYVAN, R. (2012) Nikon D3200: From Snapshots To Great Shots. San Francisco: Peachpit Press.

REVELL, J. (2011) Canon EOS Rebel T3i/600D: From Snapshots to Great Shots. San Francisco: Peachpit Press.